Creating a beautiful and realistic fox drawing is an exciting journey that blends anatomy, creativity, and skill. The keyword Drawing:1enzi6g2cvg= fox has sparked curiosity among artists, aspiring illustrators, and anyone looking to refine their drawing techniques.
This guide breaks down everything you need to know about drawing a fox, from the essential tools and materials to expert techniques and step-by-step tips.
1. Understanding Drawing:1enzi6g2cvg= fox
The keyword Drawing:1enzi6g2cvg= fox may seem unique, but it embodies a growing interest in creating realistic and detailed fox illustrations. This style of drawing involves intricate shading, blending, and a deep understanding of fox anatomy to create lifelike portraits of foxes. Whether you’re a beginner or an advanced artist, understanding this phrase is the first step toward mastering fox drawings.
2. Essential Tools and Materials for Fox Drawings
Creating a high-quality fox drawing starts with using the right materials. Here are some recommended tools that will help you produce a professional result:
- Pencils: A range from HB (for outlines) to 8B (for dark shading) is ideal.
- Paper: Choose a medium-weight paper with a fine tooth that holds shading well.
- Erasers: Kneaded erasers are useful for lightening lines, while hard erasers can erase deeper strokes.
- Blending Stumps: Essential for blending shadows to achieve smooth fur textures.
- Colored Pencils or Markers: These can add color to your fox, adding warmth and realism.
3. Anatomy of a Fox: Key Elements to Capture
Understanding a fox’s unique anatomy will greatly enhance your ability to draw one realistically. Here’s a look at the main features to focus on:
- Head and Muzzle: Foxes have narrow muzzles with a slight taper. The nose is small and rounded, typically darker in color.
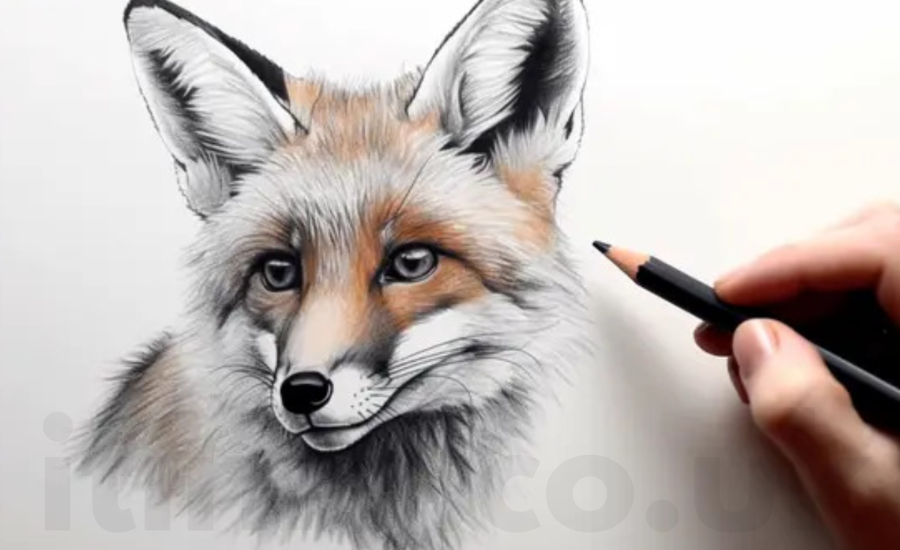
- Eyes: Fox eyes are almond-shaped with sharp, alert expressions. Pay close attention to the reflection of light in the eyes, which adds realism.
- Ears: Fox ears are tall and pointy, often standing straight up. They are an essential part of a fox’s silhouette.
- Fur: The fur on a fox can vary in texture, with a thicker neck ruff and softer fur around the body.
- Tail: Foxes have long, bushy tails. When drawing the tail, remember to add volume and texture to capture its fluffy appearance.
4. Techniques for Drawing Foxes
Drawing a fox requires various techniques to add depth, dimension, and lifelike features. Here are some popular techniques:
a) Line Drawing Technique
Start with light lines to outline the fox’s shape. Avoid pressing too hard, as these lines will act as a guideline for your final drawing.
b) Hatching and Cross-Hatching
Use hatching for lighter areas and cross-hatching for deeper shadows. This technique is especially useful for adding texture to the fur.
c) Blending
For realistic fur, use a blending stump or your fingers to soften lines and give a smoother appearance.
d) Layering
Layering different shades of pencil helps build a sense of depth, especially when drawing fur. Start with light layers and gradually build up darker areas.
5. Step-by-Step Guide to Drawing a Fox
Let’s dive into a basic, step-by-step guide for drawing a fox from scratch.
Step 1: Outline the Basic Shape
Begin with simple shapes to form the fox’s head, body, and limbs. Use circles for the head and body, and add lines to indicate the tail and legs.
Step 2: Add Facial Features
Draw the eyes, nose, and mouth, paying special attention to the size and positioning of these features. Add the ears and sketch in the rough shape of the muzzle.
Step 3: Draw the Outline of the Fur
Outline the fur using small, jagged lines around the edges of the head and body. Remember, fox fur is thick and soft, so the lines should not be too sharp.
Step 4: Start Shading
Begin shading the fox using a medium pencil (e.g., 2B). Darken areas around the eyes, nose, and under the muzzle. Shade in the ears and add light shading to areas where the fur is darker.
Step 5: Add Texture to the Fur
Using short, soft strokes, create fur patterns by shading and blending as needed. Gradually build up layers to give a realistic texture to the fur.
Step 6: Work on the Eyes
The eyes should be one of the focal points. Draw a small circle in each eye for the highlight, which adds liveliness and depth.
Step 7: Shade the Tail
Add volume to the tail by shading along its length, and don’t forget to add layers to make it look fluffy and full.
Step 8: Final Touches
Darken any final details, such as the nose and the area around the eyes. Add additional shading where necessary to complete your drawing.
6. Common Mistakes to Avoid
Avoiding common mistakes can make a big difference in the quality of your drawing. Here are some pitfalls to watch out for:
- Overly Dark Outlines: Avoid using dark outlines, especially around fur. Soft lines give a more natural appearance.
- Incorrect Anatomy: Foxes have distinct features that should be respected. Study fox anatomy to avoid disproportionate body parts.
- Ignoring Light Source: Light source affects shading. Decide on the direction of light before you start shading to give your drawing depth.
7. Advanced Tips to Enhance Your Fox Drawing
Once you have mastered the basics, try these advanced techniques to add more detail and realism to your fox drawing.
- Add Background Elements: Including forest or meadow scenery can enhance your drawing and provide context.
- Use Reference Photos: Reference images help you accurately capture a fox’s natural look, especially if drawing in specific poses.
- Try Different Poses and Angles: Experiment with drawing foxes in different poses, such as lying down, sitting, or running, to challenge yourself and develop new skills.
FAQs About Drawing:1enzi6g2cvg= fox
Q1: What is “drawing:1enzi6g2cvg= fox” specifically about?
A: “Drawing:1enzi6g2cvg= fox” likely refers to a particular style or technique associated with drawing foxes in a detailed and realistic manner.
Q2: What materials do I need for a realistic fox drawing?
A: Essential materials include graphite pencils, blending stumps, erasers, quality paper, and optionally, colored pencils or markers.
Q3: How can I improve my shading for fox fur?
A: Practice using light strokes for initial layers, and gradually add darker strokes. Blend carefully to achieve a soft, fur-like texture.
Q4: Can beginners achieve a lifelike fox drawing?
A: Yes, with practice and patience, beginners can create a realistic fox drawing by focusing on anatomy, shading, and attention to detail.
Q5: How do I draw the fox’s eyes realistically?
A: Use a darker pencil to outline the eyes and add shading. Leave a small circle as a highlight to create a realistic sparkle.
Q6: Should I use a reference image when drawing?
A: Yes, a reference image is highly recommended to capture accurate details and proportions.
Conclusion About Drawing:1enzi6g2cvg= fox
Mastering Drawing:1enzi6g2cvg= fox requires practice, patience, and an understanding of essential drawing techniques. With the right tools, attention to detail, and by following this guide, you can create a realistic fox drawing that captures the beauty of this incredible animal. Whether you’re a beginner or experienced artist, enjoy the journey of honing your fox drawing skills!